Managing Workspace Settings in TexAu
Your workspace settings in TexAu allow you to manage users, roles, and invites, and understand the limits of your current plan. This guide covers how to configure and maintain workspace-level settings for better control over team collaboration and usage.
Accessing Workspace Settings
To view or update your workspace settings:
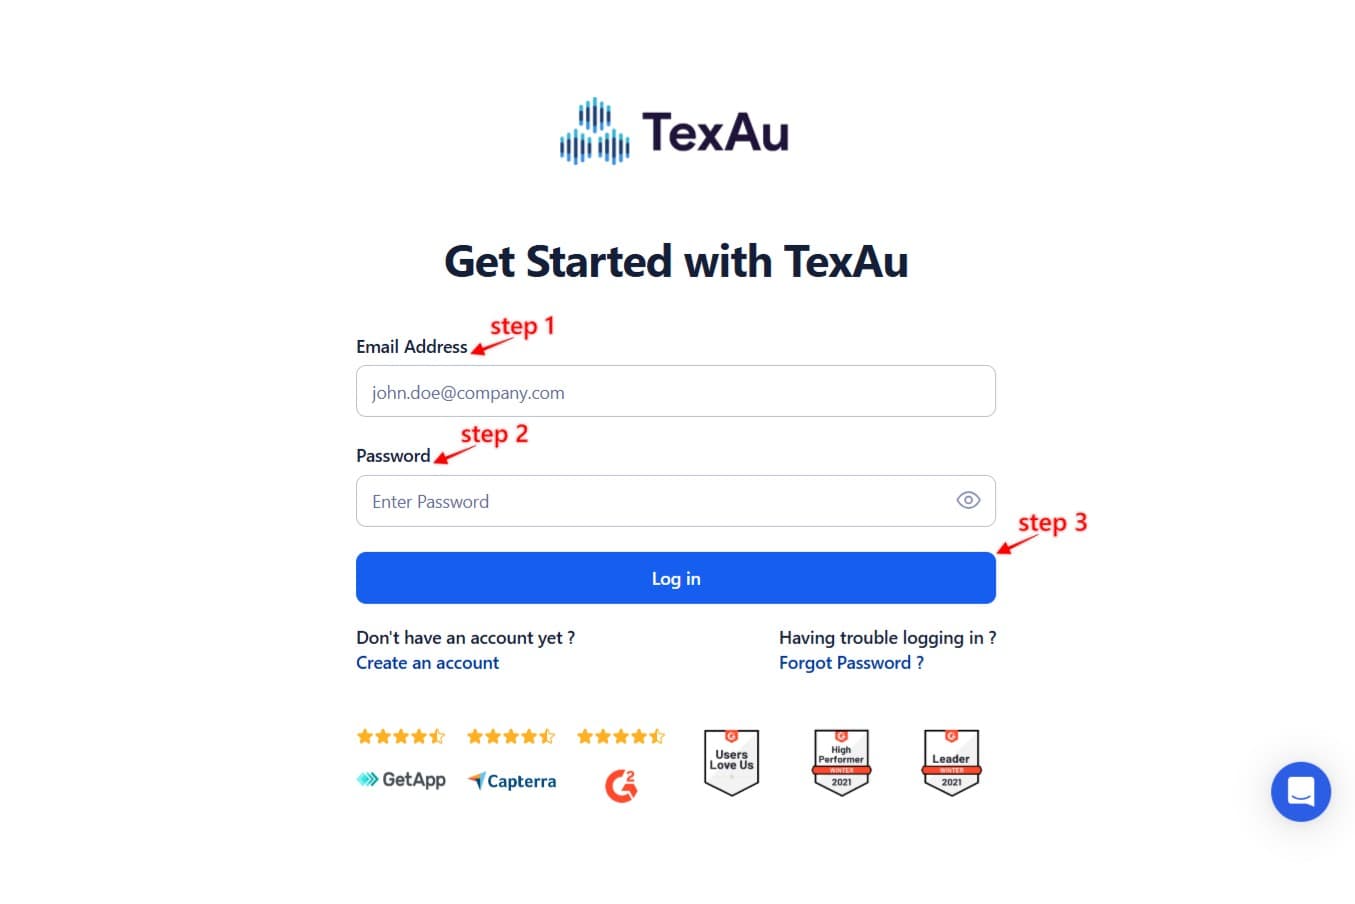
Log in to your TexAu account.
Go to Settings.
Select Workspace.
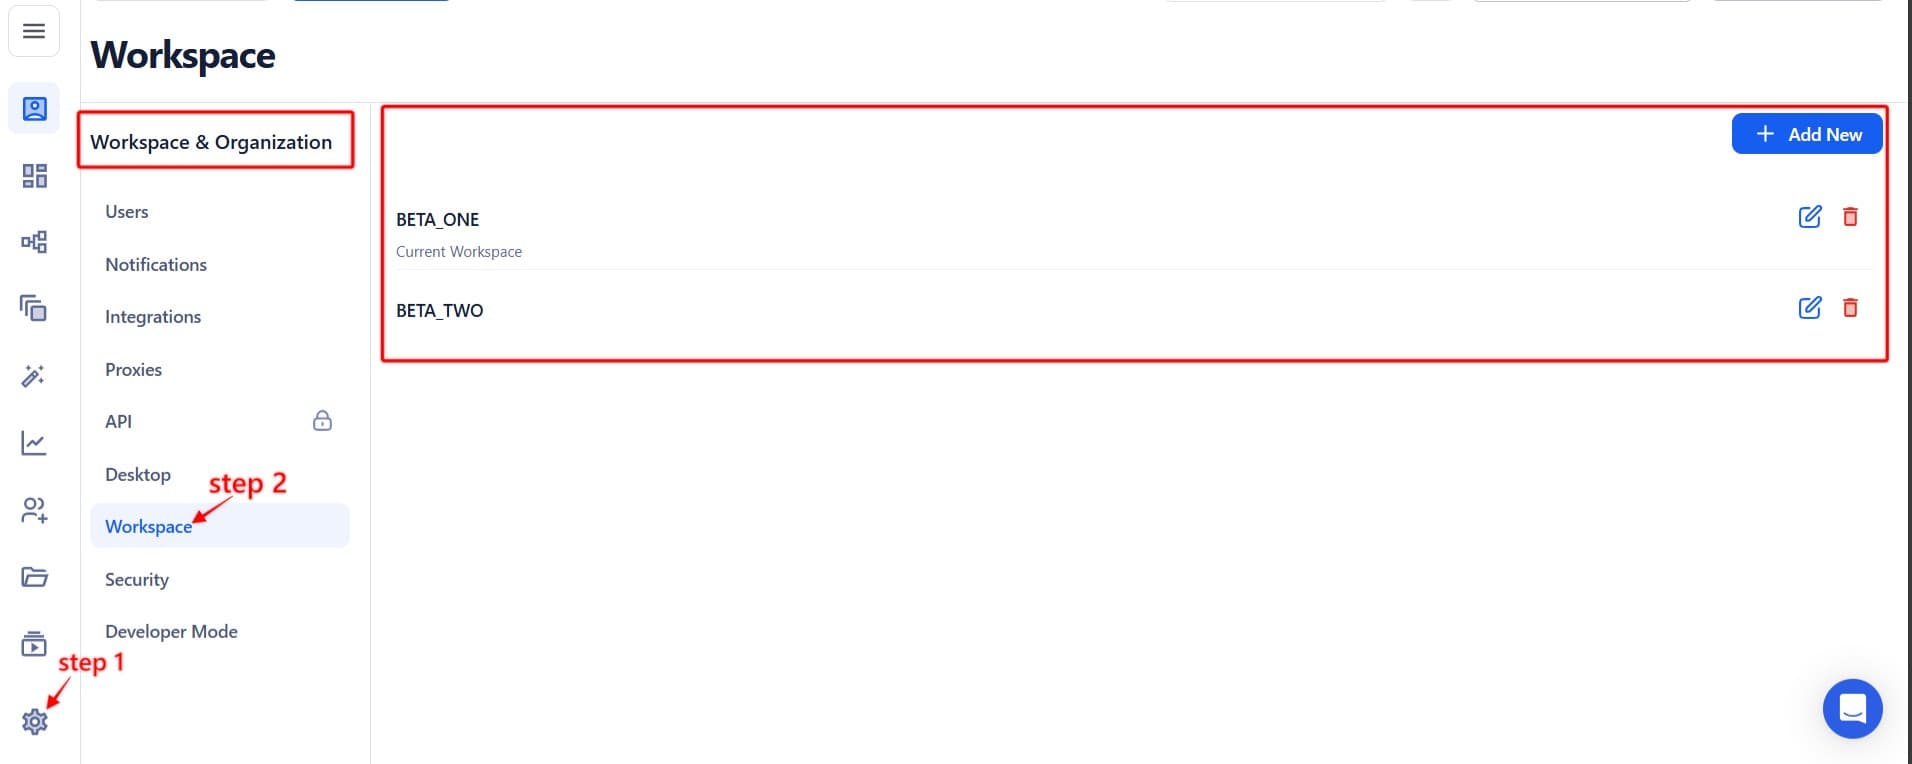
This section shows details such as the number of users, workspace limits, and pending invites.
User Roles in TexAu
TexAu supports different roles to control access across the workspace:
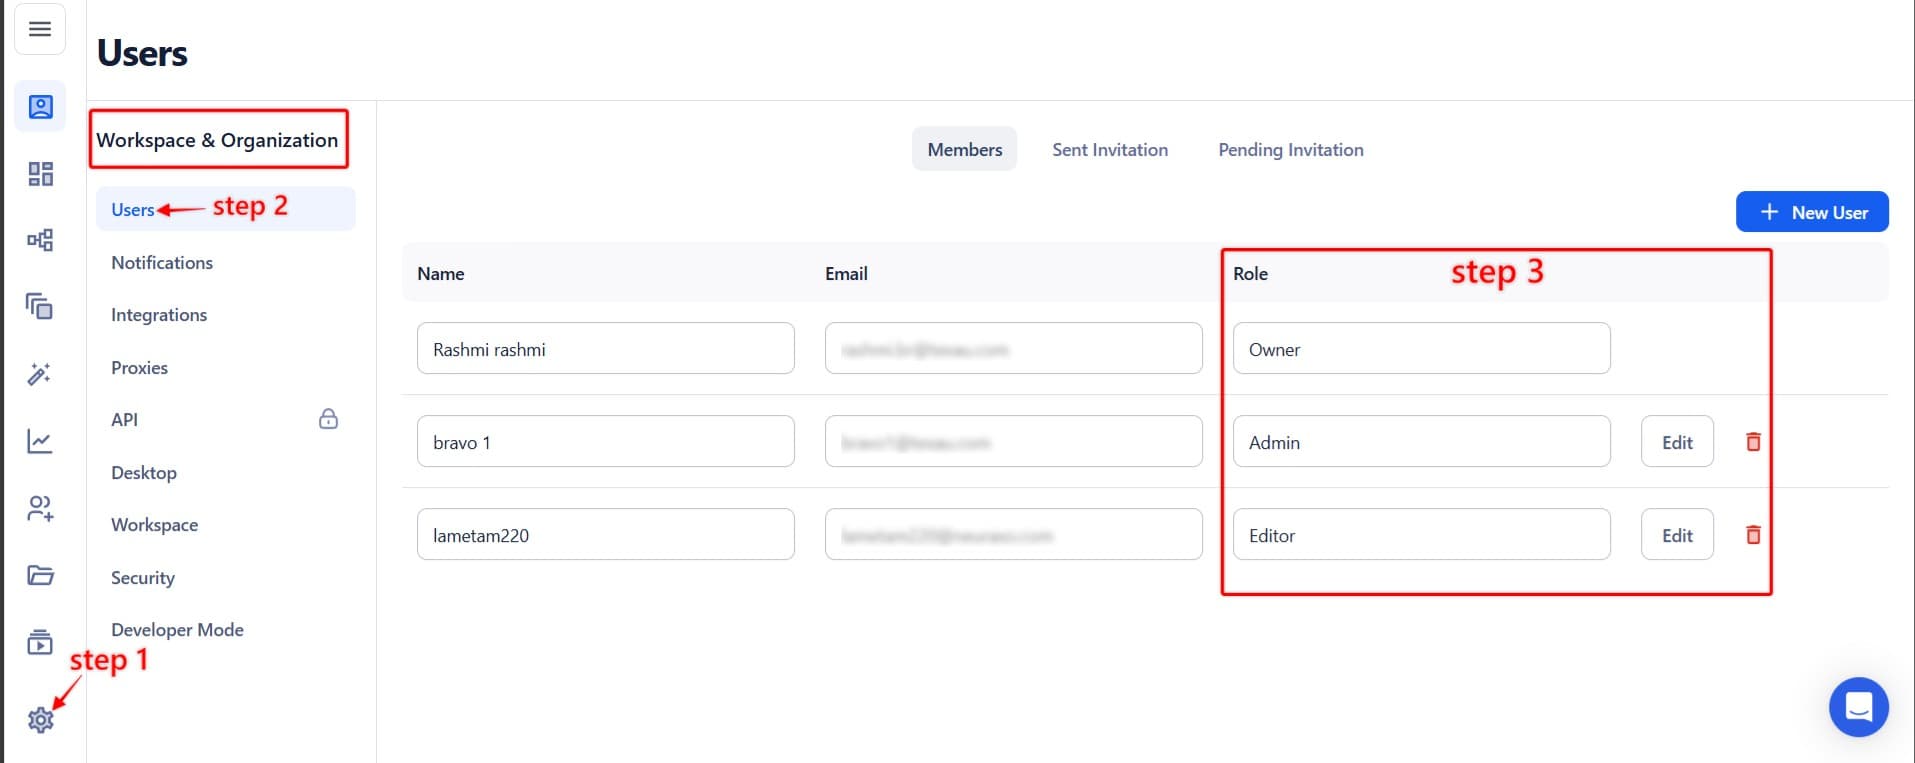
| Role | Permissions |
| Owner | Full access. Can delete the workspace, manage billing, users, and integrations. |
| Admin | Can invite/remove users, manage workflows, and update settings. |
| Editor | Can create, run, and manage workflows. |
| Viewer | Read-only access. Can view workflow results but cannot make changes. |
To change a user’s role:
- Go to Settings.
- Select the user and update their role from the dropdown.
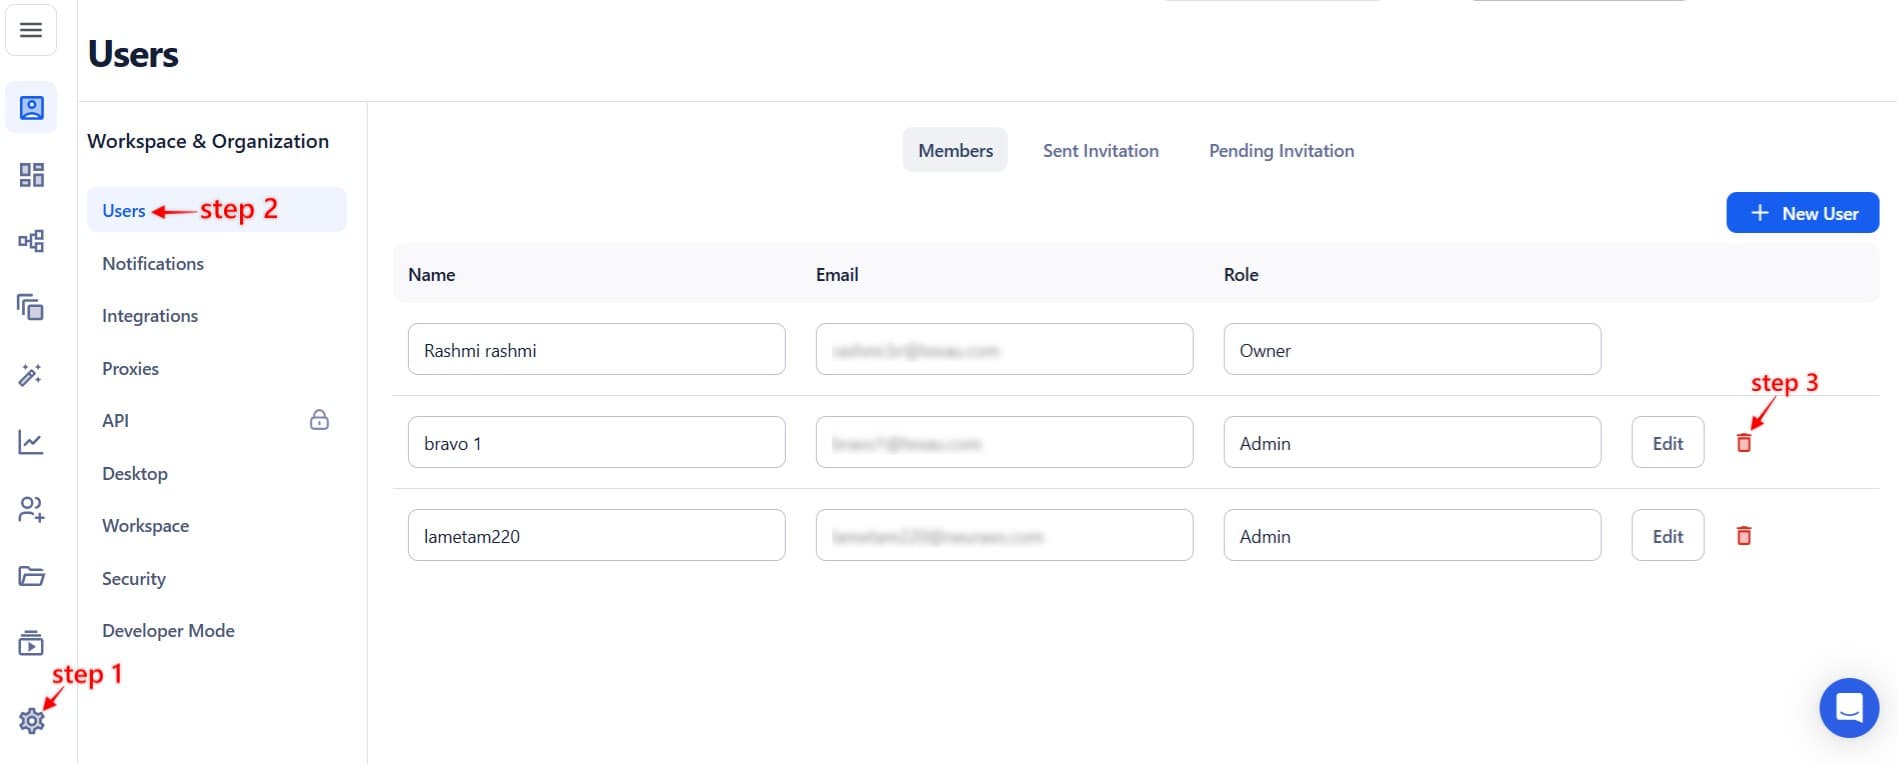
Inviting or Removing Users
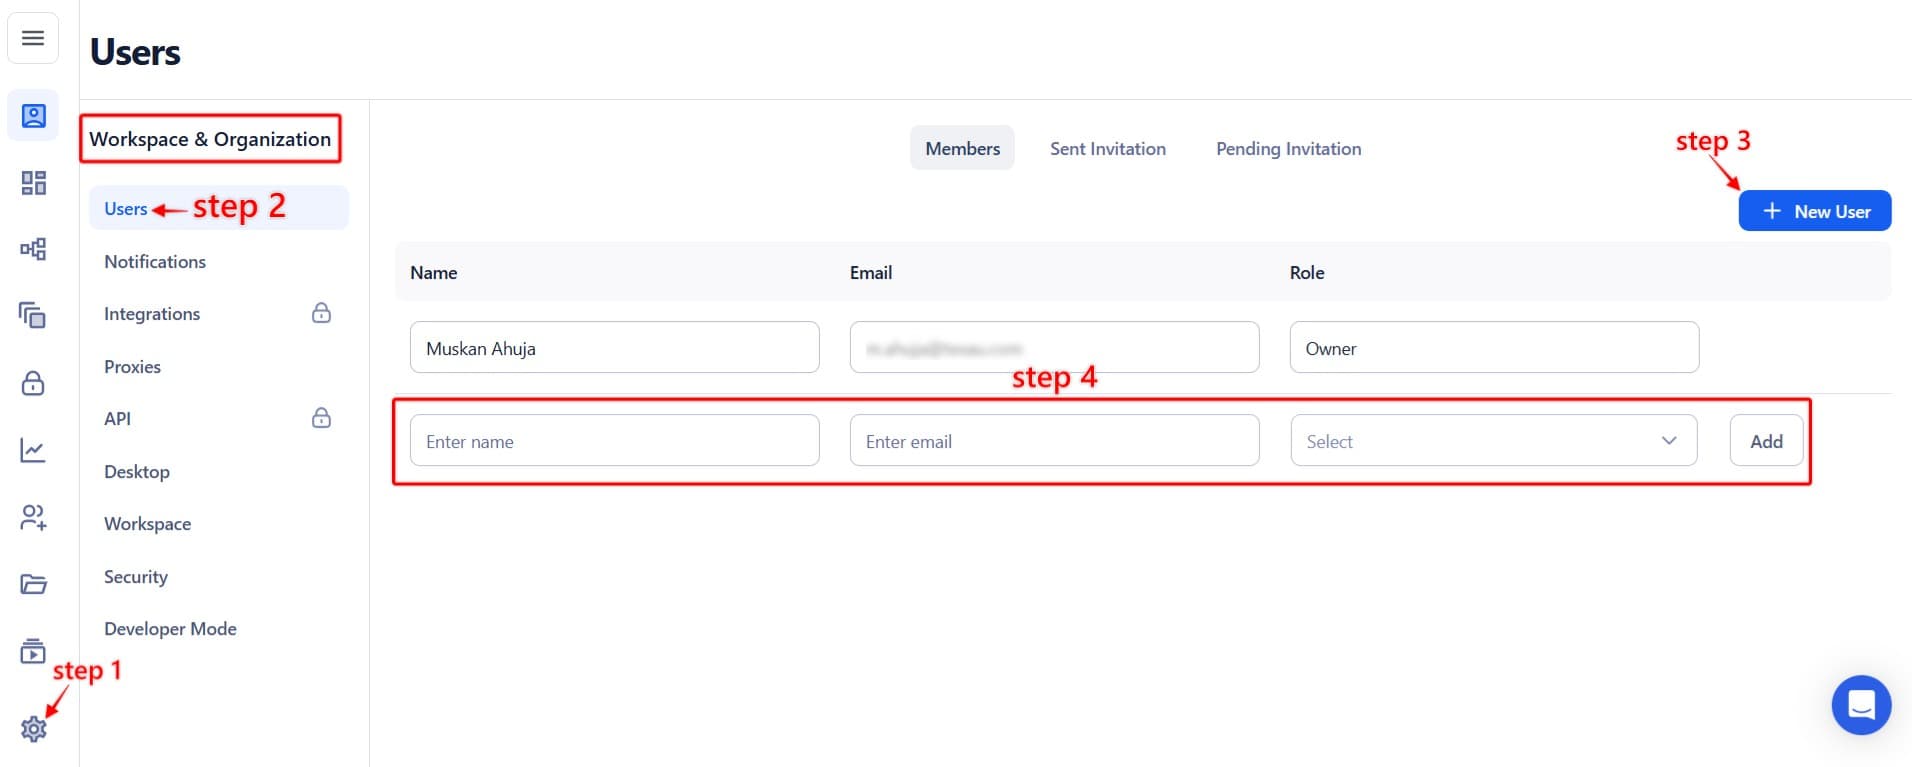
To invite users:
- Open the Settings.
- Go to Users.
- Enter the name, email, and select their role.
- Click Add.
- Pending invites will appear until accepted.
To remove a user, select them from the list and choose Remove User.
Note: Only Owners and Admins can invite or remove users.
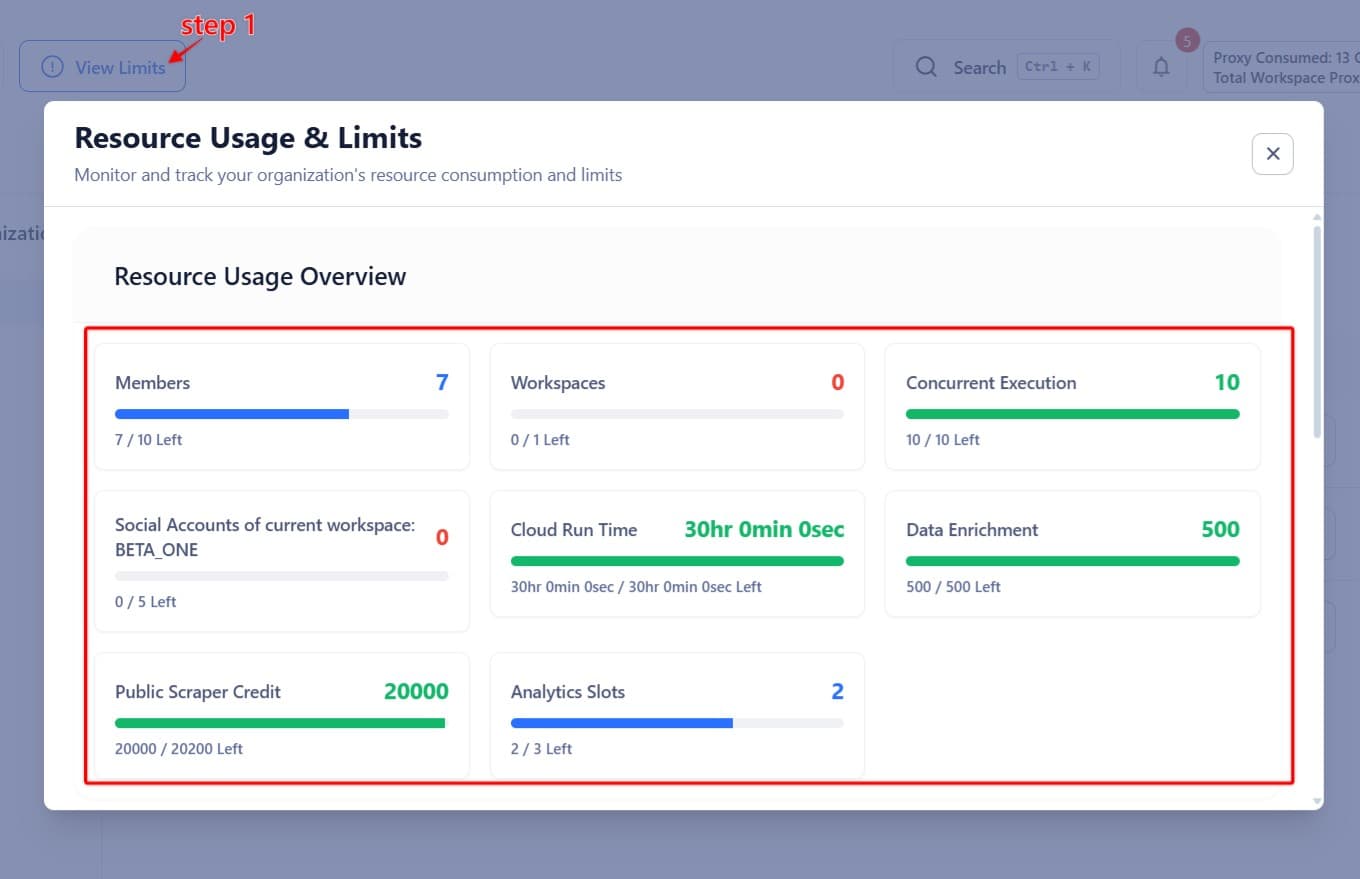
Understanding Workspace Limits
Your plan determines how many users, workspaces, and integrations you can access. There are no limits on the number of workflows you can create.
To check your current usage:
- Click on View Limits at the top.
- See cloud runtime used, number of social accounts added, workspace members, and available credits.
Proxy Settings (Account-Level)
TexAu supports two types of proxies:
- Account Proxy: Applied directly to connected social accounts.
- Custom (Add-On) Proxy: User-added proxies for advanced routing and control.
You can manage these by going to Settings > Proxies.

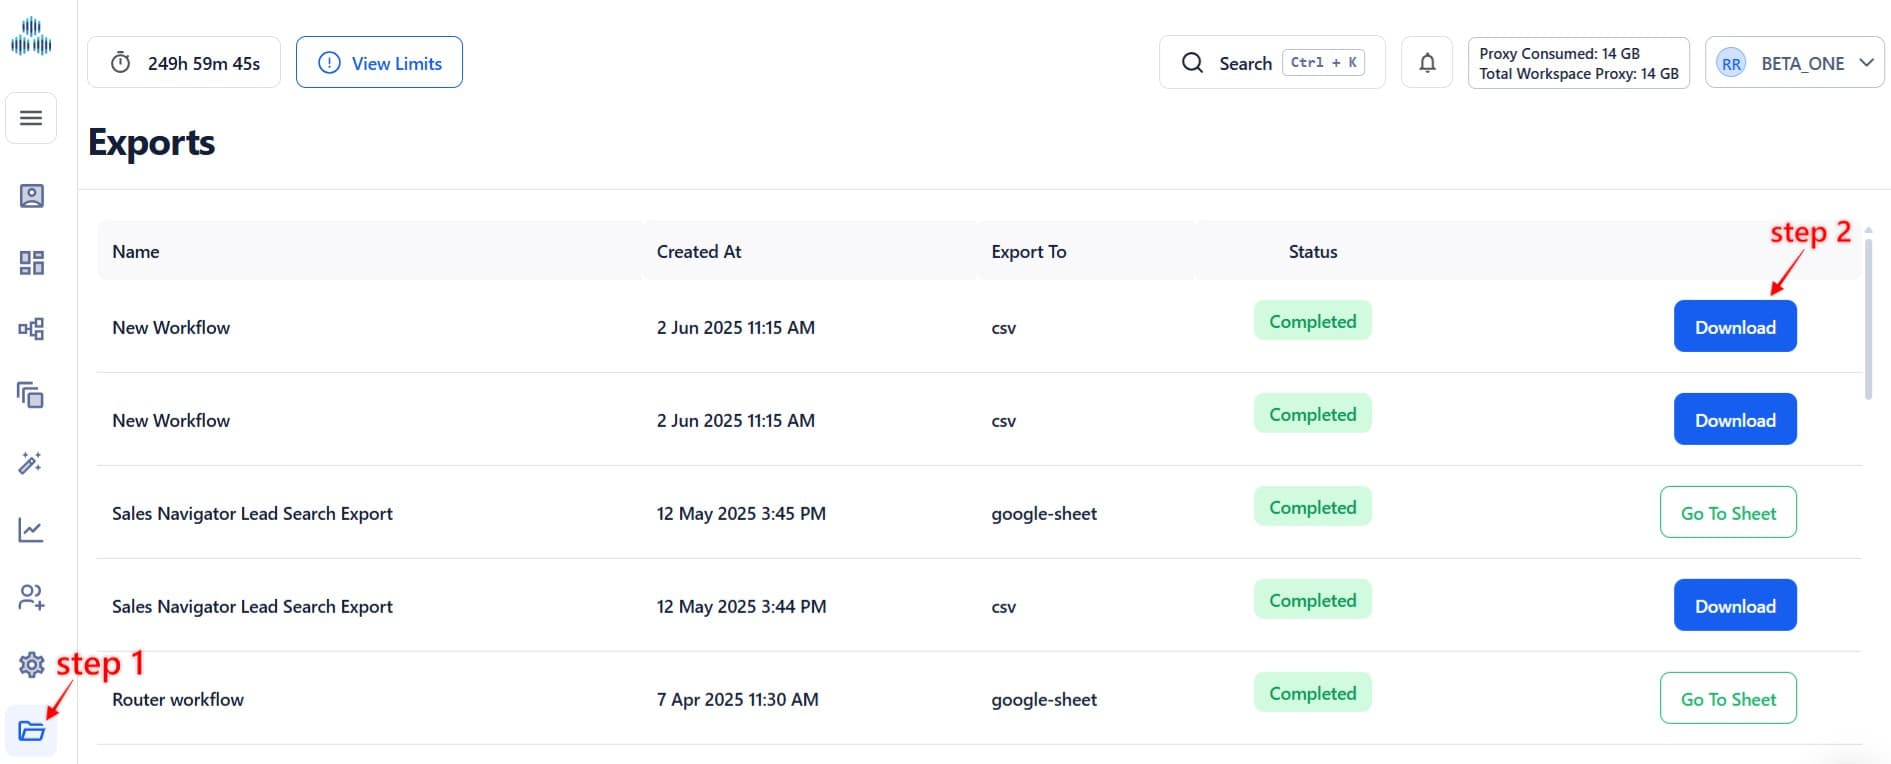
Exporting Data
To export workflow results:
- Navigate to the Exports tab to download the file.
- Exports remain available for 7 days from the time of export.
Summary
TexAu workspace settings help you:
- Manage user access and roles
- Monitor account-level limits tied to your plan
- Add and assign proxies securely
- Track usage and control who can do what within the workspace
Keeping your workspace organized ensures secure collaboration, better automation control, and efficient use of resources.

