How to Add, Invite, or Remove Users from a TexAu Workspace
Managing your team within TexAu is easy and flexible. Whether you are adding new collaborators, removing users who no longer need access, or reviewing activity logs, this guide will help you manage workspace management with confidence.
By the end of this article, you will know how to:
- Invite a new user to a specific workspace
- Remove a user when needed
- Review user activity within TexAu
Shall we begin?
1. Invite Users to a Workspace
Think of your workspace as a shared room where you and your teammates work together. To invite someone into that room:
a. Select the Workspace
At the top-right corner of your TexAu dashboard, you’ll see your current workspace’s name.
Click on it, and you will see a dropdown. Select the workspace where you want to add your teammate.
b. Navigate to Settings
Look at the left side of your screen, you will see a menu.
Click on Settings. It’s like the control panel for your workspace.

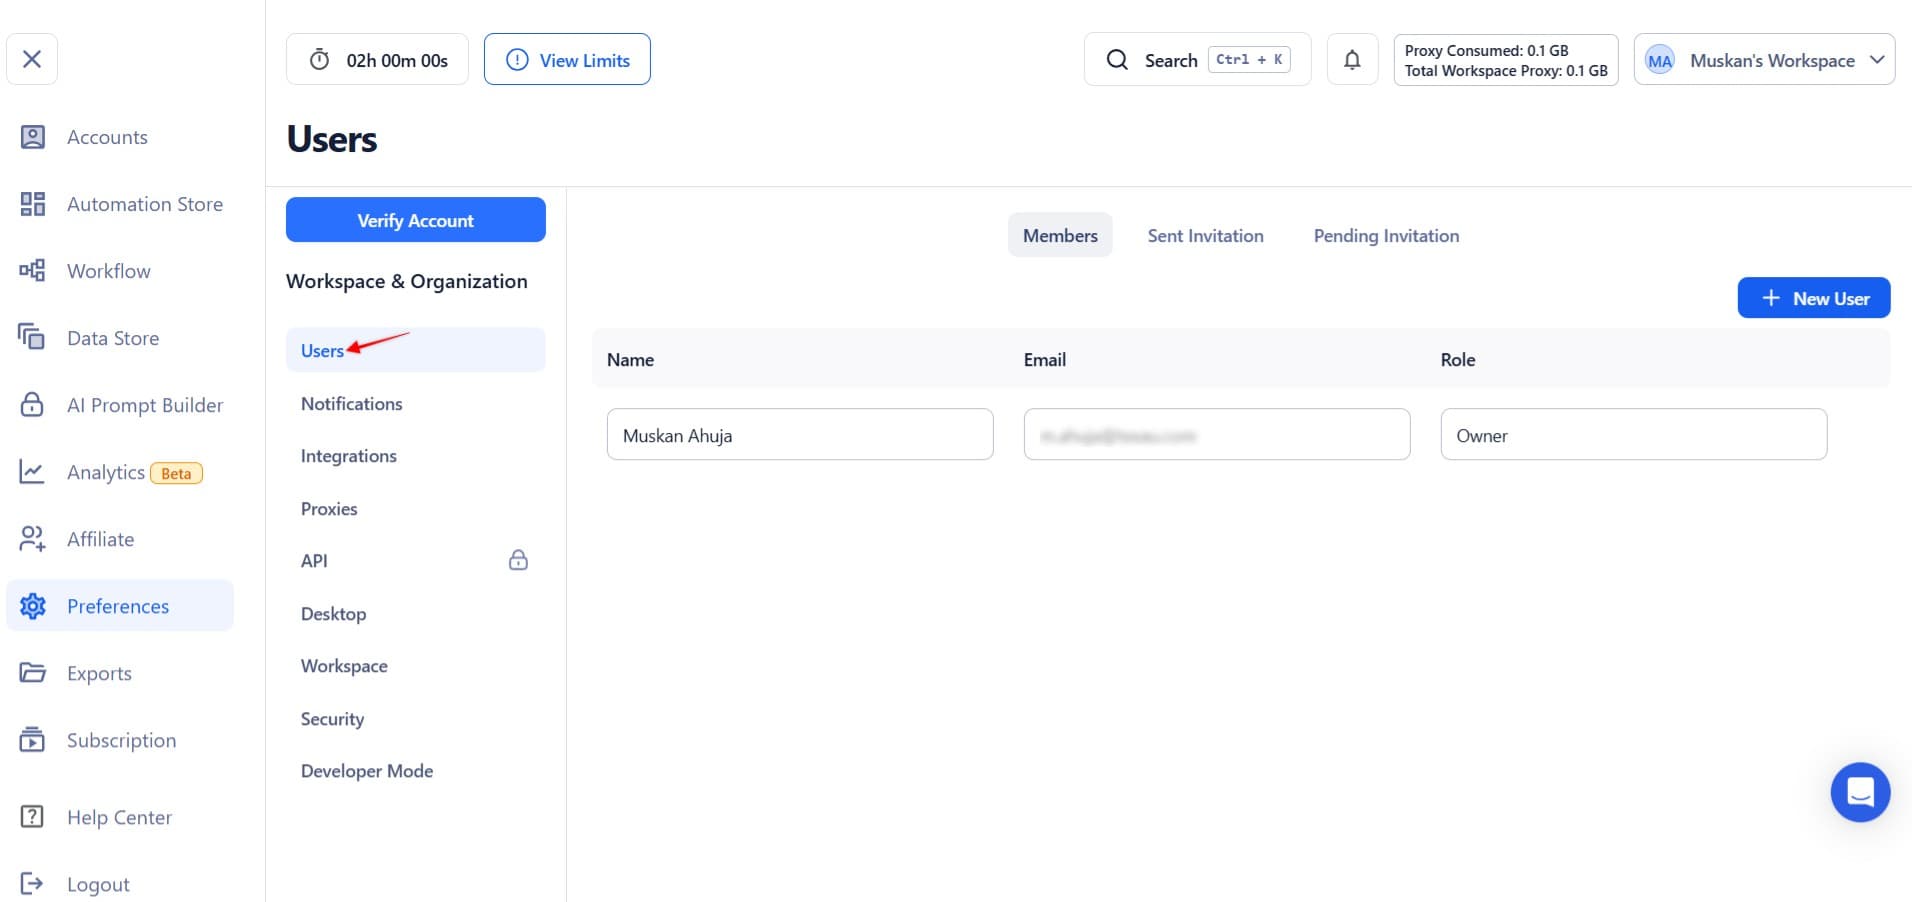
c. Access the ‘Users of Workspace’ Section
Once you are inside Settings, scroll down a bit until you find Users.
This is where you manage everyone who has access to your workspace.
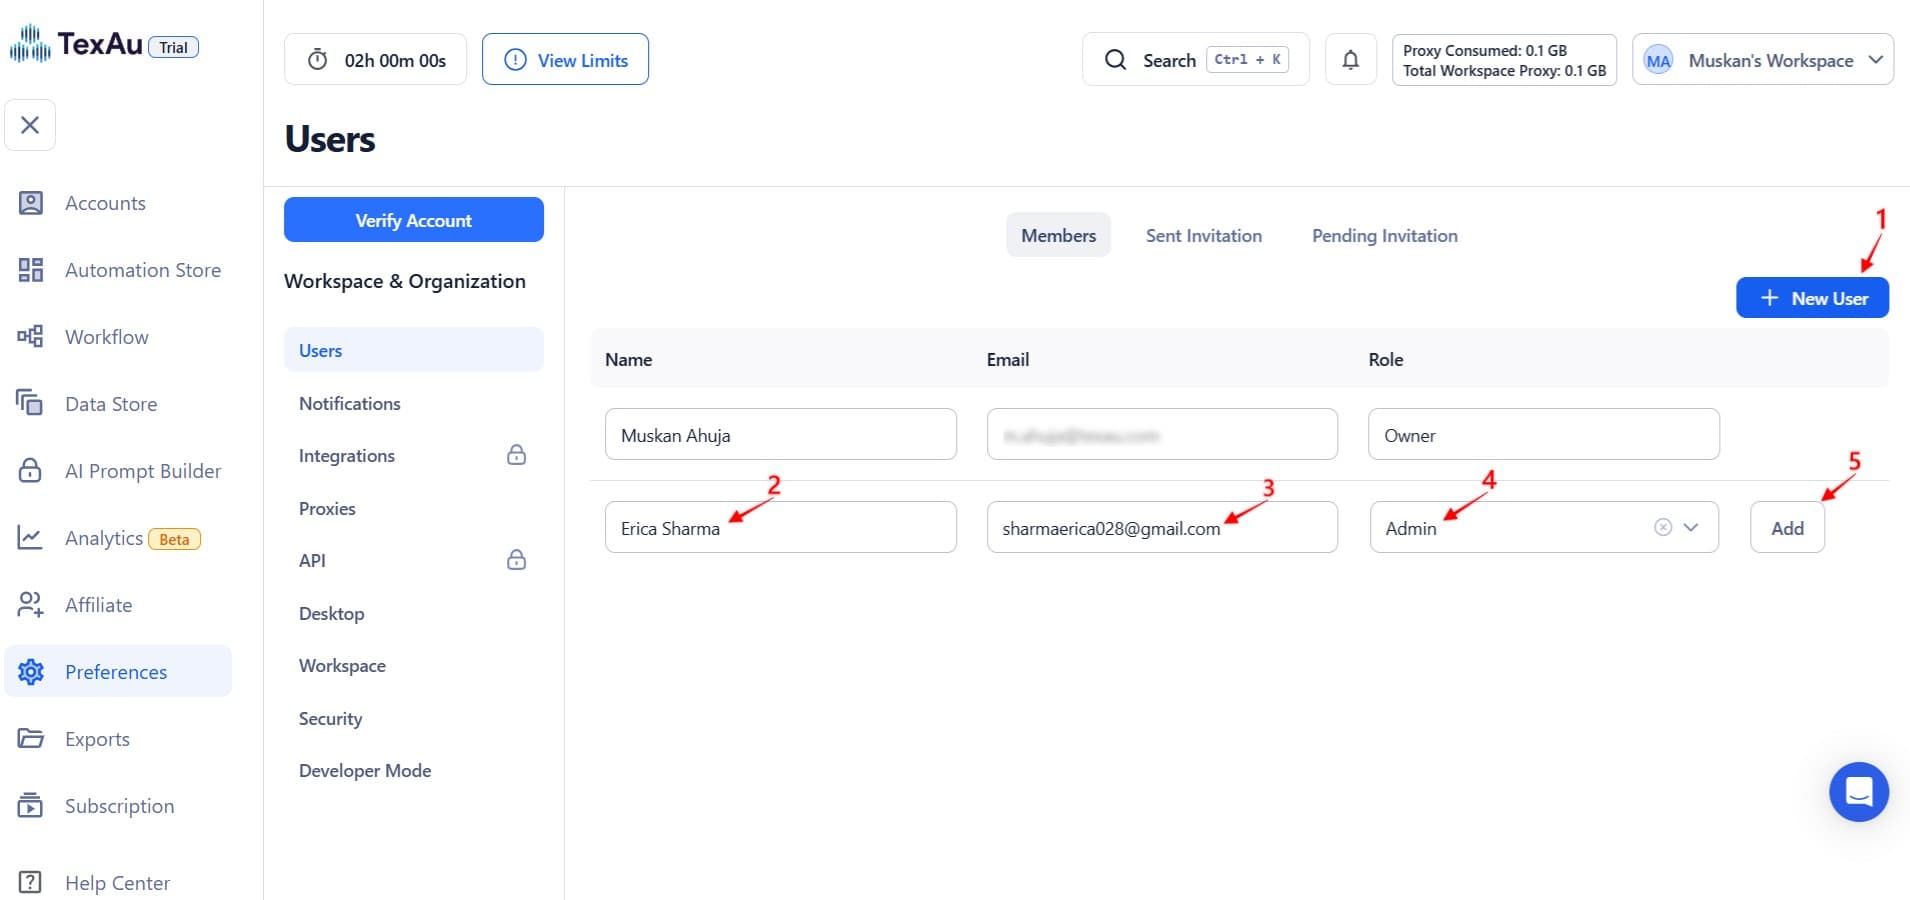
d. Send an Invitation
Now comes the fun part!
- Click the + New User button.
- Type in your teammate’s email address.
- Choose what they can do:
- Admin: Full access to everything
- Editor: Can create and edit workflows
- Viewer: Can only see what's going on
Then hit Send Invite. Done!
Note: You can’t add their name right now, just the email. But they’ll be added once they accept your invite.
2. Delete a User from the Workspace
Maybe someone left your team or no longer needs access. Here’s how to remove them quickly:
a. Go to Settings> Users
Open the Settings panel again, and go to the Users section just like before.
b. Delete the User
Click the Delete button next to the user’s email.
This action immediately and permanently removes the user from the workspace. There is no separate ‘Remove’ option.
Important: There is no way to edit a user’s role after they have been added. If you need to assign a different role, delete the user and re-invite them with the new role.

3. Review Workflow Activity for a User
Want to check what someone’s been working on in TexAu? You won’t see their login history or download a report of everything, but you can see the workflows they have run.
Here’s how:
a. Go to the Data Store
In the left sidebar, click Data Store. This section stores output from all workflow runs created by users in the workspace. Data is retained for 180 days.
You can:
- View logs
- Review schedules
- Click Export next to a workflow to download its results
Note: Do not refer to ‘executed workflows.’ Instead, refer to workflow runs or workflows created by a user.
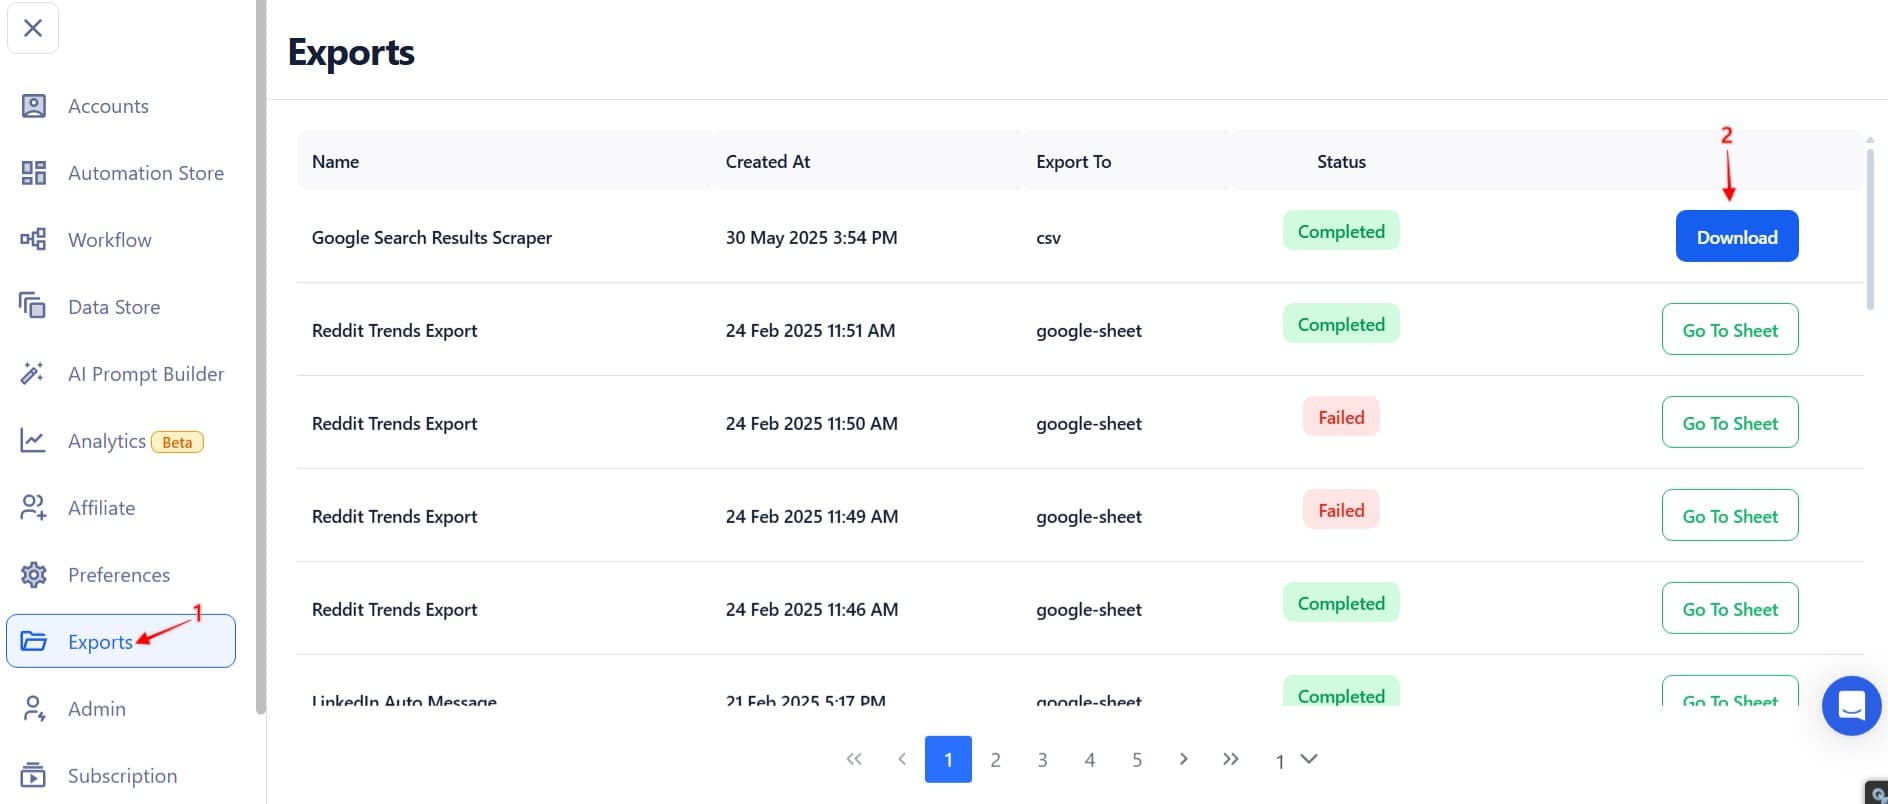
b. Check the Exports Tab (Optional)
If you or someone else downloaded a CSV file recently, you’ll find it in the Exports tab.
These files are kept for 7 days only.
But heads up:
- This section only shows downloaded files
- It won’t show who downloaded them or when
Additional Notes
Here is a quick summary of what you should keep in mind:
- You can’t change someone’s role once invited, delete and re-invite them to fix that.
- You can’t download or export user data like emails or history.
- Access is workspace-specific. No one sees everything across multiple workspaces unless they are invited to each one.
- To see what someone did, look at the Data Store. That’s your only window into their activity.

